Here is an easy tutorial on how to make 2 type of photo-filled text with Photoshop. You can use this idea in many different way in many different kind of work such as flyers, banners, digital art and even business cards. This tutorial is great for beginners but basic Photoshop knowledge is recommended. In this tutorial we use Photoshop CS6.
Photo-filled Text – Style 1
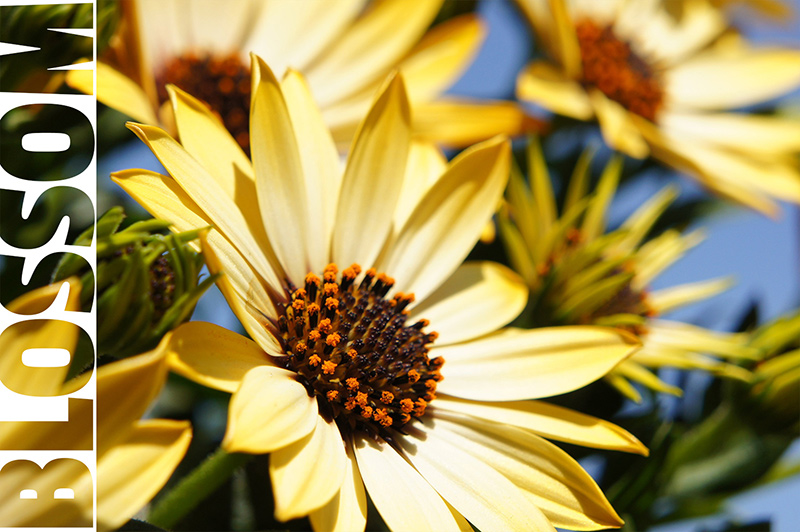
Step 1: First we are going to do a photo-filled text on a plain background. Create a new document with white background. Have the document size match the photo in our case our photo will be 1920px x 1126px and we got the photo from Pixabay. You can how ever use your chose of image and size your canvas accordingly.
Step 2: Next we are going to write the text. You can pick any color since it wont show in the end result. We chose a bold font for our text: Arial Black. Another great bold and free font is Passion One.
Step 3: After you got your text ready we are going to bring in the photo. Place it at the very top of the layers and make sure it fills the whole canvas. Right click the photo layer and select ‘Create Clipping Mask’ and clip it to the text and there you have it!
You can edit the text and move it around by selecting just the text layer. Background color can be changed as usual.


Photo-filled Text – Style 2
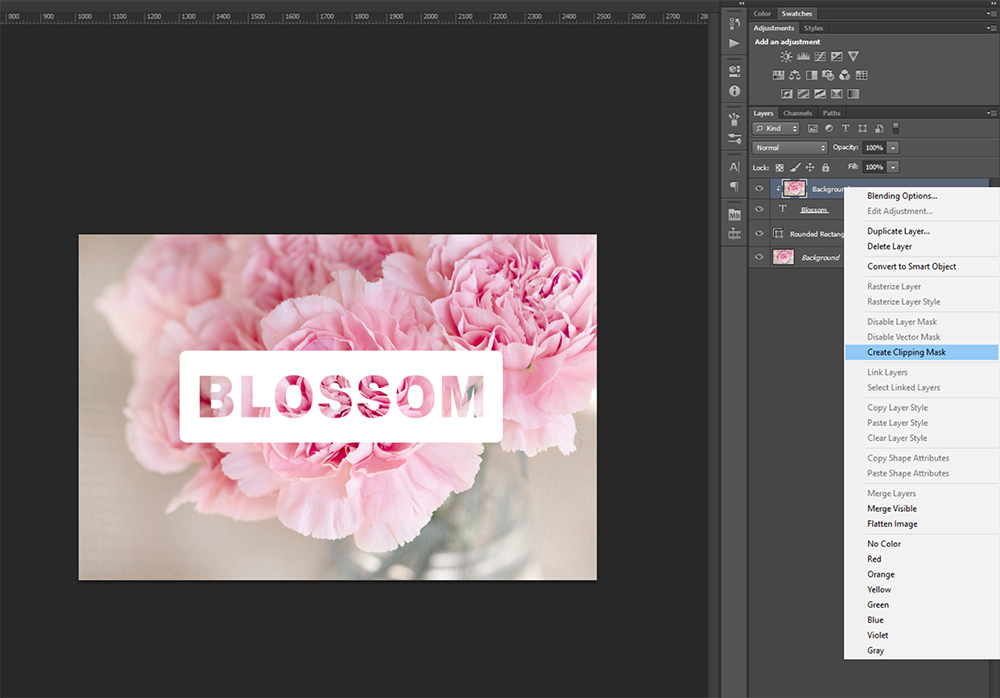
Step 1: This is a similar style text effect except with a cut out style. First open up an image that you want to use as a background, we are using another free image from Pixabay.
Step 2: Next create a shape, we used a round cornered rectangle (20px radius) in white color. You can lower the opacity of your shape or keep it as is. Then it’s time to add your text, once again the color of the text doesn’t matter since it will not be visible.
Step 3: Duplicate the background photo and move the copy to the very top of all layers and select ‘Create Clipping Mask’ and clip the image to the text.
There are other ways of doing this but when using this method you can still edit your text and move it around and there for this method gives you more freedom if you change your mind on text, font or location. If you want to move the text around remember to select the text and shape layer.
Now get creative!


One response to “How to Create Photo-filled Text with Photoshop”
I really like the way you use to choose those beautiful images for this tutorial. Really, refreshing to see them. Putting blossom word on both images above are also creative. Thank you 🙂