
The curves adjustment layer is a great tool for color correcting photos and removing color casting. In this tutorial I’ll show you a simple trick how to remove color casting from your photo. You can download the photo that we are using in this tutorial here or you can work on your own image that needs color correction. The steps are same for any photo. Here is how to do color correction in Photoshop by using a single Curves adjustment layer:
Step 1
Add a curves adjustment layer. Select the eyedropper (1.) from the Curves adjustment layer window to set the darkest point in the photo. To find out what is the darkest point in the photo, hold ALT while adjusting the slider (2.) on the left side of the chart as shown in the photo. Look where the photo turns dark and return the slider to it’s original spot and sample (3.) that dark area with the eyedropper tool that you selected earlier. Click on the images to view them bigger.

Step 2
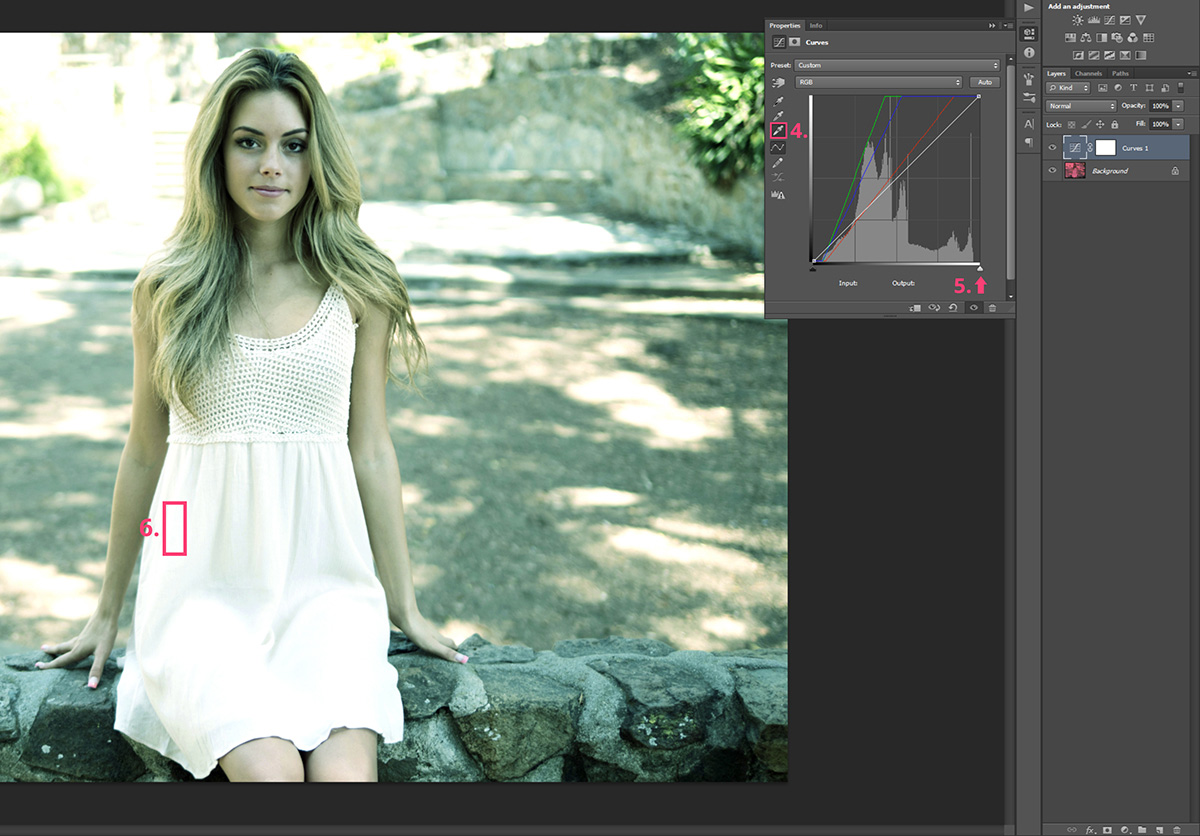
Now we are going to do the same except we are going to set the lightest point in the photo. Select the 3rd eyedropper tool (4.) as show in the photo and hold ALT and adjust the the slider on the right side (5.). Find the lightest spot, return the slider to it’s original location and sample that light spot with your eyedropper tool (6.).
Step 3
Last we are going to select the middle eyedropper tool (7.) and this time we are setting the mid point. There’s no guide for this one, just do your best selecting a mid tone from the photo.

So that is one way to color correct your photographs. I hope you liked the tutorial and if you have any questions comment below.
Download resource files (PSD):
